
Your Book Writing Journey: A Practical Guide from Idea to Launch

Listen, I get it, writing a book is a major undertaking. Staring down the blank page can be one of the scariest moments in life and, worse is not knowing where to start! I’ve been there and I’ve come out the other side. Having published 3 books now I have created this step-by-step guide for you to get your book from just an idea to a physical manifestation of your creativity..
Small disclaimer, this is just a guide, writing a book will look different for everyone so stay flexible and enjoy your journey. These steps will all be a part of your journey, maybe not in the same order and maybe they won’t be exactly the same but one way or another your book will get published.
Step 1: Idea
So you want to write a book? Well, what do you want to write about? Is your book a magical journey to a faraway land? Is it the fantastical story of your life? Is it the secret you discovered in Florence to making perfect custard? Is it the next Matrix?
The first step when writing a book is to get an idea. Your initial idea can come in many different forms:
- A title
- A character
- A plot
- A topic
- A question
- A solution
- A system or method
- A life experience
- A verse/Bible inspired topic
The idea is the spark that ignites your writing journey. It doesn’t need to be polished or even complete, just a spark is all you need.
Step 2: Flesh Out the Idea
After you have an idea it’s time to explore it. No matter how small the idea is in the beginning, if it’s going to be a full book it’s going to have to be a full story. This applies to both fiction and nonfiction alike. It is brainstorming time.
Grab your sticky notes, laptop, colored pencils, notecards, etc. Write down every scrap of an idea or inspiration for your book. All the subtopics you want to cover, all the quotes, stories, locations, and characters you want to include. Each of these ideas should get their moment, keep them on separate notecards or sticky notes (trust me this will come in handy during the next step.)
Keep in mind that this is not the time to edit. Let your ideas run wild and write every single thing down. You will “clean it up” later so don’t hold back, even if something feels only slightly related or a bit too far out of the scope write it down; you never know you might wish you’d kept it later

Step 3: Outline
This is one of my favorite steps when writing a book. After you’ve finished fleshing out all of your ideas and inspirations, every little nugget you could possibly want in your book, you can start revisions or the pre-editing phase of outlining. This is the time to hone in on the structure you want for your book.
Start by grouping ideas together to build a skeleton structure for your chapters, and set aside any ideas that don’t fit well into that structure or that you determine don’t ultimately serve the purpose of your book.
Finally, place those chapters in a logical order. Ask questions such as:
- What is the best way to take your reader from where they are to where you want them to be?
- Is there a natural progression of ideas such as the steps in this article?
- Does your reader need to know or understand a particular concept before another?
These questions will help you determine the smoothest and most functional structure for your book. The outlining phase is a great place to take your time. I think of outlining as a connect the dots picture. Outlining is when you build the dots for your final picture, the clearer your dots and the better organized the easier it will be to connect them when you start writing.

Journey Notes
Whether you’re writing your story, chasing your dream, or simply craving more peace and clarity—get weekly encouragement and resources sent straight to your inbox.
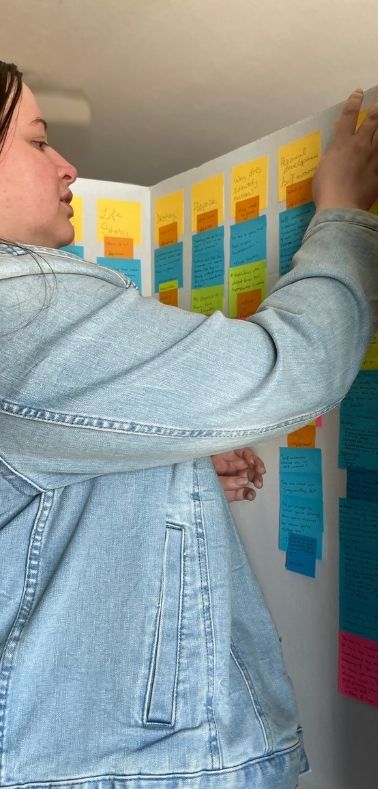
I like to use sticky notes to outline so I can easily move and rearrange them until I settle on the final order. After you’ve completed the order of ideas you will have an outline for your book. Plotting a fiction novel is similar but can be more involved as you have to order the events of the story but also the character development, I highly recommend the book Save the Cat! Writes a Novel for more on plotting a fiction novel.
Step 4: 1st Draft
The time to write will eventually come, and that’s step 4. Use your outline as a roadmap and start getting words on paper. I use my sticky notes “dots” and fill in the gaps between ideas with my writing. (I dive a little deeper into outlining in my article 3 Months to Published)
Because this is your first draft it is imperative that you DO NOT EDIT! This is very similar to the flesh-out step in that you allow flow and inspiration to lead the way. You have an outline as your map to make sure everything you want is actually included but when it comes to writing, you just have to do it. Try not to think too much when writing your first draft, there will be plenty of time for that later.
Step 5: Take a Break
This can be the most challenging step if you allow it to be. Taking a break from your book after you write your first draft can be incredibly helpful, it allows you to come back and look at your work with fresh eyes and more clarity.
To avoid this time being challenging it’s best to plan a project or something to do during this time to keep you from going back to it too soon. It is recommended that you take at least a 6-week break from your first draft before starting any editing, that means not looking at your manuscript and doing your best to not think about it either.
Step 6: Self-Edits
With fresh eyes, after your break, you can now read through your book. When self-editing, look for big-picture edits such as:
- Plot holes
- Missing information
- Unintelligible sentences
- Unimportant/irrelevant sections
- Out of order thoughts
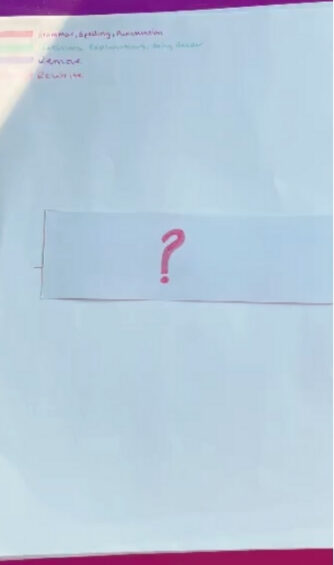
Don’t get caught up in the grammar, sentence structure, punctuation, or spelling here. This is the time for you to make the edits only you can make.
Become Undistractable
Learn to identify and overcome distractions, free your time, and enhance your focus.
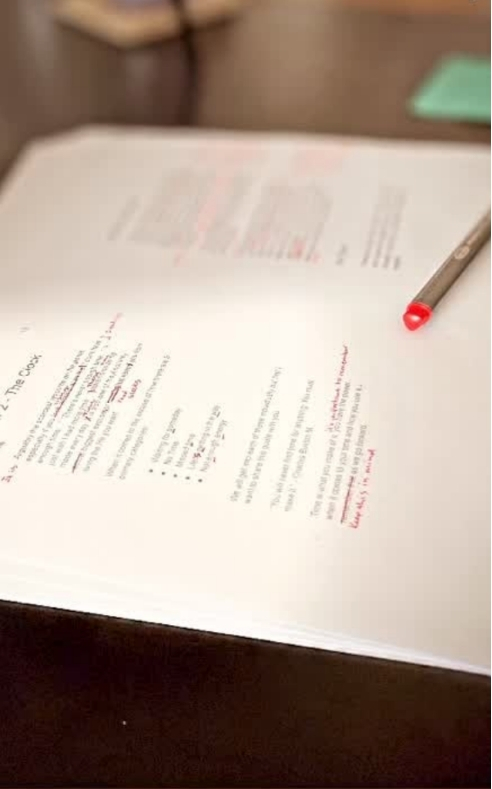
Step 7: Line-by-Line Edits
Now you can get hung up on grammar, sentence structure, punctuation, or spelling. Step 7 is the time for the full editing process. Diving deep into each sentence looking for mistakes and possible improvements.
When doing a line-by-line edit it is encouraged that you hire an editor but I will say it is not necessary if it doesn’t fit your budget. There are many editing softwares available if you prefer, you could also do it yourself, you can utilize friends and family as proof-readers. There are many ways to edit your book without hiring a professional editor if you are looking to do it solo or to save money.
However, this is the final edit of your book and upon its completion, your book should be ready for publishing so bear that in mind.
Step 8: Formatting
How does your manuscript (the book you’ve written) go from a Word document on your computer to a physical paperback in your hand? Formatting. As with editing you can hire a professional book formatter or do it yourself using formatting software such as Microsoft Word, Adobe InDesign, Vellum, or the many others available.
When formatting your goal is to organize the contents of your book in a clear and structured way on the page. During the formatting step you will also need to make decisions such as:
- The size you want your book to be
- What font you would like to use
- How you would like your chapter headers to be designed
You decisions will be heavily design related and shouldn’t be made with just your preferences in mind, you should also take into account readability, publishing/genre standards, and what would work best for your reader. At the end of the day it’s your choice and you should like your book but remember that it’s been created for your reader, do your best to balance these two things. Formatting is the step when your book will start to feel real and tangible.

Step 9: Cover Design
Cover design is key to a book’s success, no matter how many times it’s said that you “can’t judge a book by its cover” readers always do.
For this step, it is highly encouraged that you hire a professional cover designer as cover design can be very complex. There are many factors to consider and quite a bit of expertise required. However, if you choose to design your cover yourself there are programs available to do so in like Adobe Illustrator or Canva.
Step 10: Launch Team/Beta-readers
You’ve done it! Your book is done, take a moment and congratulate yourself. This is a monumental accomplishment, only about 3% of authors who start writing a book actually finish it and you are now part of that 3%!
Now that your book is ready for readers it’s time to share it. Choose a few friends and family or put out a public call for beta-readers. They will be individuals who will read your book, they are usually given a free copy, which can be either digital or physical. In return beta-readers will typically review and/or promote your book on public platforms such as Amazon, Goodreads, Instagram, Tik Tok etc.
Utilizing beta-readers/launch teams can expand your social reach and provide you with social proof (testimonials/reviews) for the day your book is launched increasing the probability of success, and giving prospective readers a way to “research” if they will enjoy your book.
Step 11: Marketing
Marketing can be as complicated or as simple as you want it to be. It can be all social media posts, one email to your lead list, flyers in your local coffee shop, word of mouth, etc.
In today’s world social media is typically the best way to market your book but it is by no means the only way. When marketing your book be sure to leverage every step in this process to your advantage. A few ideas might be:
- Do a Title Reveal
- Film a “write with me” vlog
- Do a Cover Reveal
- Post about the topic you cover in your book to start a conversation with your readers ahead of time
- Ask questions of your followers that cause them to become curious about what your book is about
- Share aesthetic photos and videos that spark interest in your story
- Tease the aesthetic of the story or characters
- Create a quiz that will help your reader determine if the topic applies to them (ex. a book about common lies women believe, create a quiz to help the reader determine what common lie they may be believing)
When it comes to marketing there is no clear-cut rule book, you have to do your own research on what is working at that moment and on the platform you plan to market on specifically. Then do what feels right for you.
Just remember to always stay authentic to your unique voice and your unique book, authenticity will always win over your readers more than cookie cutter marketing.
Step 12: Upload
If you are self-publishing now is the time to upload your book to your distributor of choice. There are lots of options; Amazon Kindle Direct Publishing, IngramSpark, Barnes and Noble Press, and many more.
In this step, you will upload your book to the distributor and order an author copy to ensure everything is perfect before launch day. After uploading there are usually a few processing days when the distributor is reviewing your manuscript for formatting issues.
If there are any issues you should be notified and can then make the necessary changes before uploading again. Keep in mind that you will have to wait a few days for them to check it again if you have to re-upload, be sure to factor in this buffer time when determining your publish date and when you will upload your manuscript.
When uploading you will also need to:
- Write your book’s description
- Upload a cover image
- Add your ISBN number (if you purchased one, the distributor may also provide a free one if you prefer)
- Tag any keywords/categories for your book
There are several small details in the uploading process so be sure to go slow and read through every page of the process to ensure nothing is missed.

Step 13: Launch Day
It’s here! It’s here! It’s here! You did it! Launch day is the day your book goes out into the world to impact all the lives you’ve dreamt it would all this time.
It is a day of celebration, celebration that should be shared and utilized to promote your book’s release. Share it by:
- Posting a countdown ahead of time for the release,
- Going live on social media to celebrate and encourage followers to buy a copy,
- Share all the reviews and promotions written/posted by your beta-readers/launch team
- Sharing quotes from the book
There are so many ways to share this baby you’ve labored over. You’ve spent all your time and energy creating this book for the last few weeks/months/years and now you get to celebrate the result of your journey.
Continuing the Journey
Launch day may feel like the end of your writing journey but it is important to continue sharing about your book frequently. Regularly promoting your book continues to foster new interest and reach new audiences as time goes by. You’ve worked so hard to create this incredible resource for your readers don’t stop putting it out there to reach more people who would love it. This is also when you can start your next book!
To keep your writing journey smooth check out this article for what mistakes to avoid.


